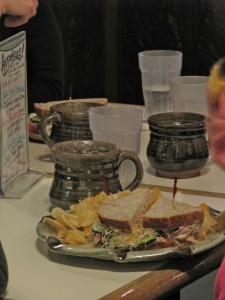
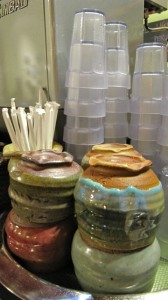
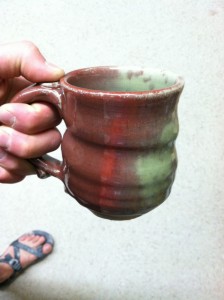
 I’ve been exploring Copper Red glaze recipes for about 2 years now, and I still don’t know exactly what causes the reddest of red glazes. Some recipes are consistently dull liver color, yet they will blush orange-red from time to time, like the mug pictured to the left. It was in a firing that did not have enough reduction. A lot of the pottery was mostly green, like the right side of this mug. For some reason this pot has an awesome red-orange racing stripe down the side right where the green transitions to red. Was it because the flame was hitting it in a weird way? It wasn’t even close to the burner ports….
“Copper Red Glazes” by Robert Tichane is the best resource I’ve found for Copper Reds. If you want to learn about reds I say read it, then read it again. He suggested that any base glaze can be adapted to a Copper Red glaze by adding 2% Copper Carbonate and 3% Tin Oxide and then firing in a reduction atmosphere. This inspired the above glaze, which was originally an Elaine Coleman Celadon that I found in an old Ceramics Monthly. I added the Copper and Tin, as well as a bit of EPK to raise it from cone 9 to cone 10. Here’s the recipe, and don’t forget to glaze very thick!!
Copper Red/Elaine Coleman Celadon
|
|
Whiting
|
21.0
|
Custer Feldspar
|
25.0
|
EPK Kaolin
|
20.0
|
Silica (325-mesh)
|
25.0
|
Ferro Frit 3134
|
8.8
|
Zinc Oxide
|
2.7
|
Tin
|
3.0
|
Copper Carbonate
|
2.0
|
Bentonite
|
2.0
|
Talc
|
2.0
|
Total:
|
111.5
|
Another book that’s super helpful for Copper Reds, and just about every other glaze at Cone 9-10 is “The Complete Guide to High-Fire Glazes: Glazing and Firing at Cone 10” by John Britt. Buy this book, seriously. I learned most of what I know about glazing from this book. John also describes a bunch of his techniques all over Youtube, here’s a great one for glaze testing:
Easy Glaze Testing (color blend) (part 1)
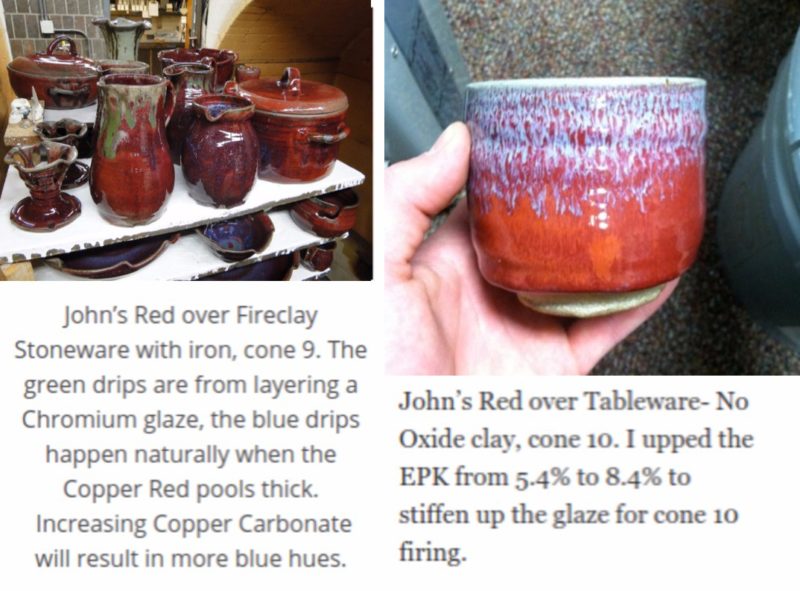
The images below show the “John’s Red” glaze on stoneware. It’s also important to note that John’s Red glaze is much more vibrant than the above glaze (Copper Red/Elaine Coleman Celadon), which is often liver colored, or muddy brownish red. I wonder why???
The left image shows John’s Red at cone 9 over Fireclay Stoneware with iron. I really like these dark burgundy reds, but recently I’ve switched to “Tableware- No Oxide” clay from Continental Clay, which is a white stoneware with very low iron content. It helps brighten up the reds, like the cup shown on the right. The rim was also dipped in a Nuka glaze, which ran down the pot during the firing.
Here’s the recipe I’m working with. It’s John’s Red, but I increased the EPK from 5.4% to 8.4% to stiffen up the glaze for cone 10 firing:
John Britt Red, cone 10
|
|
Custer Feldspar
|
96.4
|
Whiting
|
27.2
|
Silica (325 mesh Flint)
|
31
|
EPK
|
18
|
Frit 3134
|
18.2
|
Talc
|
7.2
|
Zinc Oxide
|
9
|
Tin Oxide
|
2.4
|
Copper Carbonate
|
1.9
|
Bentonite
|
2
|
Total
|
213.3
|
Nuka is an ash glaze. Check out “Ash Glazes” by Phil Rogers for some great recipes and info on ashes. Nuka’s are so awesome that they deserve an entirely different blog post, so I’ll just give you the rundown on the recipe I’ve developed over about 2 years. I get wood ashes from a friend with a wood stove and dry sift them through 12 mesh, then again through 40 mesh. The glaze recipe changes with the type of wood ash and the sifting process, but here is my current cone 10 recipe…although it’s likely to change because right now it looks a lot better at cone 11:
Nuka, 4/23/12
|
|
Wood Ash
|
33
|
Custer Feldspar
|
50
|
Silica (325 mesh Flint)
|
30
|
Whiting
|
20
|
Bone Ash
|
20
|
Bentonite
|
10
|
total
|
163
|
Firing is another crucial component to Copper Reds. Currently I fire in a large natural gas kiln with about 30 cubic feet of stackable space in about 10-11 hours. I essentially use John Britt’s Reduction 1 firing cycle with a few tweaks. I fire oxidation until cone 010 drops (about 1700 degrees F) and then do 30 minutes of heavy reduction- the kiln usually stalls in temp. Then, I fire in mild to medium reduction until cone 10 is very soft. I’d say more reduction is better than less here. I’ve yet to see adverse effects from over-reducing but I have gotten green from under-reducing. Lastly, I open the damper and put the kiln into straight oxidation for 30 minutes, until cone 10 drops and 11 is soft- then shut down with the damper closed. Robert Tichane writes about the importance of peak temp. oxidation for bright reds, and I’ve seen great results with this technique.
Now go mix up some glaze and start chasing the red!
